

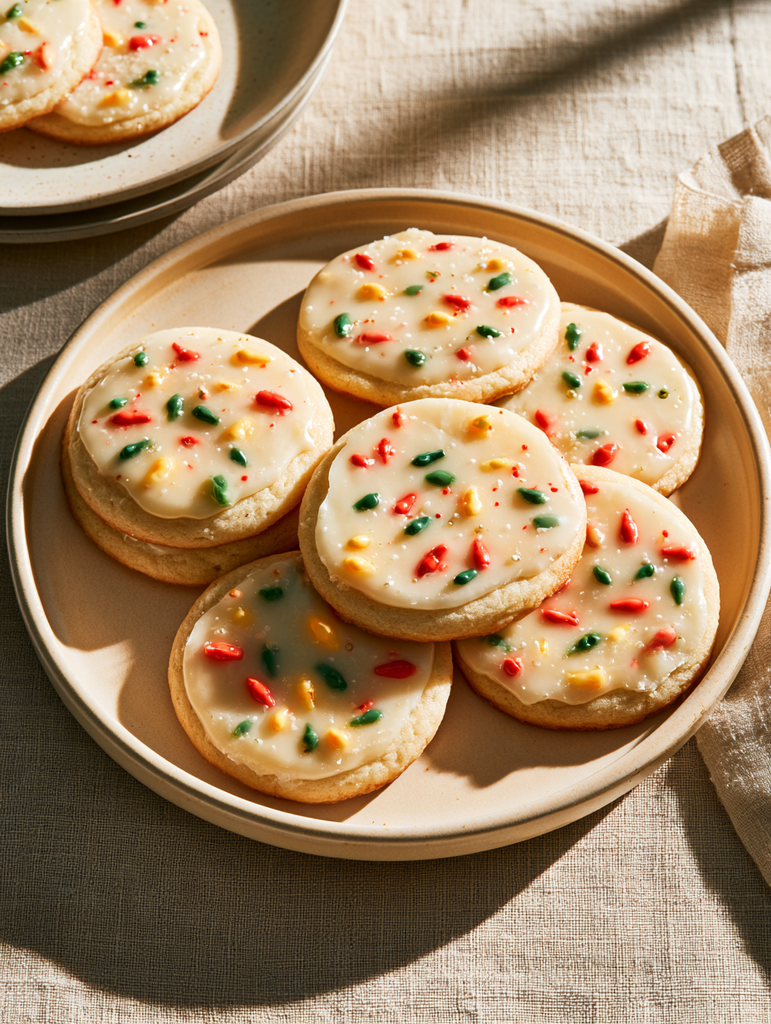
Bring a little extra sparkle to your holiday baking with these Christmas Lights Sugar Cookies! Made with soft, buttery sugar cookies and decorated with colorful royal icing, these festive treats look just like strings of glowing Christmas tree lights. They’re cheerful, eye-catching, and a fun addition to any Christmas cookie platter.
The sugar cookie dough is easy to work with, making it perfect for rolling, cutting, and decorating. Each cookie gets a smooth base of royal icing before colorful lights are piped on top to create the classic Christmas look. You can use your favorite Christmas colors to make every cookie unique.
These cookies are wonderful for holiday parties, cookie exchanges, homemade gifts, or a fun afternoon of baking with family. Make a batch ahead of time, let the icing dry, and enjoy a festive treat that looks almost too pretty to eat!
Why You’ll Love These Christmas Lights Sugar Cookies
- Festive and colorful: The multicolored royal icing lights make these cookies instantly recognizable and perfect for Christmas.
- Classic buttery flavor: The sugar cookies have a delicious buttery, vanilla flavor that pairs beautifully with sweet royal icing.
- Great for decorating: The sturdy dough rolls out easily and holds its shape when baked, making it ideal for Christmas cookie cutters.
- Make-ahead friendly: You can bake and freeze the cookies before decorating, making holiday preparation easier.
- Fun for all ages: Decorating the cookies with different icing colors is a creative holiday activity for kids and adults.
Ingredients You’ll Need
These Christmas Lights Sugar Cookies require simple baking ingredients for the cookie dough and a few essentials for the royal icing.
For the Sugar Cookies
- All-purpose flour: Provides structure and helps the cookies hold their shape when cut and baked. Measuring with a kitchen scale gives the most accurate results.
- Baking powder: Gives the cookies a little lift while keeping them tender.
- Salt: Balances the sweetness and enhances the buttery flavor.
- Unsalted butter: Adds richness and creates a tender, delicious sugar cookie. Make sure it’s softened to room temperature.
- Granulated sugar: Sweetens the dough and helps create the classic sugar cookie texture.
- Large eggs: Bind the ingredients together and provide structure. Room-temperature eggs blend more easily into the butter mixture.
- Pure vanilla extract: Adds warm vanilla flavor that complements the buttery cookie base.
For the Royal Icing
- Powdered sugar: Creates the smooth, sweet base of the royal icing.
- Meringue powder: Helps the icing whip into a thick consistency and dry firm enough for decorating.
- Water: Adjusts the icing to different consistencies for outlining, flooding, and adding details.
- Food coloring: Gel food coloring works especially well because it adds vibrant color without making the icing too thin. Use red, green, yellow, blue, or any Christmas colors you like.
How to Make Christmas Lights Sugar Cookies
The process is simple: prepare and chill the dough, cut and bake the cookies, then decorate them with colorful royal icing. Allow enough time for the icing to dry before stacking or packaging the finished cookies.
Step 1: Prepare the Sugar Cookie Dough
Preheat your oven to 350°F.
In a medium bowl, whisk together the all-purpose flour, baking powder, and salt until evenly combined. Set aside.
In a large mixing bowl, beat the softened butter and granulated sugar with an electric mixer for about 3 minutes, until creamy.
Add the eggs and vanilla extract. Beat for another minute until everything is well combined.
With the mixer running on low speed, gradually add the flour mixture. Continue mixing until the dough begins to pull away from the sides of the bowl.
Step 2: Knead and Chill the Dough
Transfer the dough onto a large piece of parchment paper. Use your hands to knead it for a few minutes until it comes together smoothly.
Divide the dough into two portions and wrap each portion in parchment paper. Refrigerate for about 30 minutes.
Chilling makes the dough easier to roll and cut while helping the cookies maintain their shapes during baking.
Step 3: Roll and Cut the Cookies
Place one portion of chilled dough between two sheets of parchment paper. Roll it evenly with a rolling pin until it’s between 1/8 and 1/4 inch thick.
Use your favorite Christmas cookie cutters to cut out the shapes. Remove the excess dough around the cookies, but leave the cut shapes in place on the parchment paper.
Carefully transfer the parchment paper with the cookies onto a baking sheet. Keeping the shapes in place helps prevent them from stretching or losing their form.
Repeat with the remaining dough, gathering and rerolling scraps as needed.
Step 4: Bake the Sugar Cookies
Bake the cookies at 350°F for 10–13 minutes, or until the edges are just slightly golden brown.
The centers should remain relatively pale. Avoid overbaking if you want soft, tender sugar cookies.
Remove the baking sheet from the oven and allow the cookies to cool before transferring them to a cooling rack. Make sure they are completely cool before decorating with royal icing.
Step 5: Make the Royal Icing
Add the powdered sugar, meringue powder, and 1/3 cup of water to a large mixing bowl.
Beat with an electric mixer on low speed for about 6 minutes. The icing will become very thick and fluffy.
Add 4–5 tablespoons of additional water and mix until combined. This creates the medium-consistency icing, which should resemble toothpaste.
Transfer half of the icing to a separate bowl. Add another 1–2 tablespoons of water to this portion, mixing until it reaches a thinner consistency that runs off a spoon like glue. This is your flood icing.
Divide the icing into smaller bowls and tint each portion with gel food coloring.
Keep the icing covered when you’re not using it so it doesn’t dry out.
Step 6: Decorate the Christmas Lights Cookies
Transfer the medium-consistency icing to a piping bag fitted with a small opening. Pipe an outline around the edges of each cookie.
Next, use the thinner flood icing to fill in the outlined areas. A plastic squeeze bottle makes this step easier, but you can also use a piping bag.
Spread the icing gently to cover the cookie surface, making sure it reaches the piped border.
Allow the base icing to dry for about one hour.
Once the surface has set, use the medium-consistency icing to pipe the Christmas light details. Add colorful light shapes in red, green, yellow, blue, or your favorite festive colors.
Let the decorated cookies dry completely before serving, stacking, or packaging.

Tips for Perfect Christmas Lights Sugar Cookies
- Measure the flour accurately: Too much flour can make the dough dry and difficult to roll. Weighing it with a kitchen scale is the most reliable method.
- Use softened butter: Butter should be soft enough to mix easily but not melted. This helps create a smooth, evenly mixed dough.
- Don’t skip chilling: Refrigerating the dough for 30 minutes makes it easier to handle and helps the cookies keep their shapes.
- Roll the dough evenly: Aim for a consistent thickness between 1/8 and 1/4 inch so the cookies bake evenly.
- Keep the cookies on the parchment: Removing excess dough around the cut shapes before moving the parchment helps prevent misshapen cookies.
- Watch the baking time: Bake until the edges are only slightly golden. Overbaking can make the cookies dry and crisp.
- Use gel food coloring: Gel colors provide bright, vibrant shades without adding too much liquid to the royal icing.
- Pay attention to icing consistency: Medium icing is best for outlining and details, while thinner flood icing fills the cookie surfaces smoothly.
- Let the icing dry: Allow the base layer to set for about an hour before adding the decorative details. Give the finished cookies enough time to dry completely before storing them.
Equipment Needed
You don’t need special equipment to make these cookies, but a few basic baking and decorating tools will make the process easier.
- Measuring cups and spoons or a kitchen scale
- Mixing bowls
- Whisk
- Electric hand mixer or stand mixer
- Parchment paper
- Rolling pin
- Christmas cookie cutters
- Baking sheets
- Cooling rack
- Piping bags
- Small piping tips or a cut piping bag
- Plastic squeeze bottle (optional, for flood icing)
- Small bowls for coloring icing
- Toothpick or scribe tool (optional, for smoothing icing)
Christmas Lights Sugar Cookie Variations
These cookies are easy to customize for different holiday themes and decorating styles.
1. Traditional Red and Green Christmas Lights
Use red, green, and yellow royal icing to create a classic Christmas color combination. Pipe the lights in alternating colors for a cheerful, traditional holiday look.
2. Multicolored Christmas Lights
Create a bright string of Christmas lights using blue, pink, purple, orange, yellow, red, and green icing. This colorful version is especially fun for kids and makes a beautiful addition to a Christmas cookie platter.
3. White and Gold Christmas Lights
For a more elegant look, use white royal icing as the base and decorate with gold, white, and pale yellow details. This creates a simple, sophisticated cookie that’s lovely for holiday parties.
4. Christmas Tree Light Cookies
Use Christmas tree-shaped cookie cutters and pipe a string of colorful lights winding around each tree. Add a small yellow star at the top for an extra festive touch.
5. Sprinkle Christmas Lights Cookies
If you want to simplify the decorating, add tiny festive sprinkles to the wet flood icing. You can still pipe the light details once the base has dried.
How to Store Christmas Lights Sugar Cookies
Once the royal icing has dried completely, store the cookies in an airtight container at room temperature. Keep them in a cool, dry place and avoid stacking them until the icing is fully set.
For longer storage, the undecorated baked cookies can be frozen before decorating. Place them in a freezer-safe airtight container with parchment paper between layers.
The cookie dough can also be prepared ahead of time and chilled before rolling and baking. This makes it easier to spread the holiday baking over a couple of days.
Frequently Asked Questions
Can I make Christmas Lights Sugar Cookies ahead of time?
Yes! You can prepare the cookie dough, bake the cookies, or make the royal icing ahead of time. The baked cookies can also be frozen before decorating for several months. When you’re ready, thaw them and decorate once they have reached room temperature.
Why does the sugar cookie dough need to chill?
Chilling firms up the butter and makes the dough easier to roll and cut. It also helps the cookies hold their shapes in the oven instead of spreading too much during baking.
How do I know when the sugar cookies are done?
The cookies are ready when the edges are just slightly golden brown. Depending on their size and thickness, baking takes about 10–13 minutes. Avoid waiting for the tops to turn golden, as this can result in overbaked cookies.
What is the difference between medium-consistency and flood royal icing?
Medium-consistency icing is thicker and works well for outlining cookies and piping decorative details. Flood icing is thinner and flows easily into the outlined areas to create a smooth surface.
Can I use regular food coloring instead of gel food coloring?
Yes, but gel food coloring is recommended because it provides more vibrant colors without adding much liquid. If you use liquid food coloring, add it gradually and watch the consistency of the icing.
How long does royal icing take to dry?
The base layer should dry for about one hour before you add the decorative details. The finished cookies need additional time to dry completely before stacking or storing. Drying time can vary depending on the thickness of the icing and the humidity in your kitchen.
Can I freeze Christmas Lights Sugar Cookies?
Yes. The baked, undecorated cookies can be frozen before decorating and kept for several months in a well-sealed freezer-safe container. Thaw them completely before adding royal icing.
Final Thoughts
These Christmas Lights Sugar Cookies are a festive way to bring color and creativity to your holiday baking. With their buttery sugar cookie base and smooth royal icing, they’re as delicious as they are pretty.
Whether you make them for a Christmas party, a cookie exchange, or a fun family baking afternoon, these cheerful cookies are sure to brighten your dessert table. Choose your favorite colors, decorate each cookie with a string of Christmas lights, and enjoy a homemade holiday treat!
If you make these cookies, leave a rating and review to share how they turned out. I’d love to hear which colors you used to decorate your Christmas lights!
Print
Christmas Lights Sugar Cookies: Festive Royal Icing Cookies
- Total Time: 33 minutes
- Yield: 20 cookies
Description
Christmas Lights Sugar Cookies are soft, classic sugar cookies decorated with colorful royal icing to resemble festive Christmas tree lights. The buttery cookies are cut into shapes, outlined and flooded with royal icing, then finished with colorful decorations.
Ingredients
For the Sugar Cookies
- 6 cups all-purpose flour (2 pounds)
- 2 teaspoons baking powder
- 2 teaspoons salt
- 4 sticks unsalted butter (1 pound), at room temperature
- 2 cups granulated sugar
- 2 large eggs, at room temperature
- 2 teaspoons pure vanilla extract
For the Royal Icing
- 16 ounces powdered sugar (1 pound)
- 1/4 cup plus 1 tablespoon meringue powder
- 1/3 cup water, plus more as needed
- Food coloring (gel food coloring recommended)
Instructions
For the Cookies
- Preheat the oven to 350°F. In a medium bowl, whisk together the flour, baking powder, and salt until combined and any lumps are removed. Set aside. Measuring the flour with a kitchen scale is the most accurate method.
- In a large bowl, beat the butter and sugar with an electric mixer for 3 minutes. Add the eggs and vanilla extract and beat for another minute.
- With the mixer on low speed, gradually add the flour mixture. Blend until the dough begins to pull away from the sides of the bowl.
- Transfer the dough to a large piece of parchment paper. Knead by hand for a few minutes, then divide into two sections and wrap each in parchment paper. Refrigerate for about 30 minutes.
- Place another piece of parchment paper over the dough and roll with a rolling pin until it is between 1/8 and 1/4 inch thick. Cut into shapes and remove the excess dough. Leave the cutouts in place and transfer the parchment to a cookie sheet.
- Bake for 10–13 minutes, or until the edges are slightly golden brown. Let the cookies cool completely before decorating. Alternatively, freeze the cooled cookies undecorated for several months.
For the Royal Icing
- Place the powdered sugar, meringue powder, and 1/3 cup water in a large bowl. Beat with an electric mixer on low speed for 6 minutes. The icing will be very thick and fluffy.
- Add 4–5 tablespoons of water and mix to combine. This creates medium-consistency icing, which should have a toothpaste-like texture.
- Transfer half of the icing to another bowl. Add another 1–2 tablespoons of water to this portion to create flood consistency. It should run off a spoon like white school glue.
- Divide and color the icing as desired. Place the medium-consistency icing in a piping bag with a small opening and pipe an outline around the edges of each cookie.
- Fill the outlined cookies with flood-consistency icing. A plastic squeeze bottle or piping bag can be used to distribute the icing.
- Allow the icing to dry for about 1 hour, then add decorations using the medium-consistency icing.
Notes
- Yield: Makes about 20 cookies, approximately 3 inches each.
- Chilling the dough: Refrigerate the dough for about 30 minutes before rolling to make it easier to handle.
- Rolling thickness: Roll the dough between 1/8 and 1/4 inch thick.
- Cookie storage: Cooled, undecorated cookies can be frozen for several months before decorating.
- Icing consistency: Medium icing should resemble toothpaste and is used for outlining and details. Flood icing should flow like white school glue and is used to fill the cookie centers.
- Water adjustments: Add water gradually to reach the desired icing consistency.
- Nutrition note: The original recipe notes that the calorie count is not entirely accurate because quite a bit of royal icing may be left over. The nutrition values represent the total recipe ingredients.
- Prep Time: 20 minutes
- Cook Time: 13 minutes
- Category: Cookies, Dessert
- Method: Baking
- Cuisine: American