
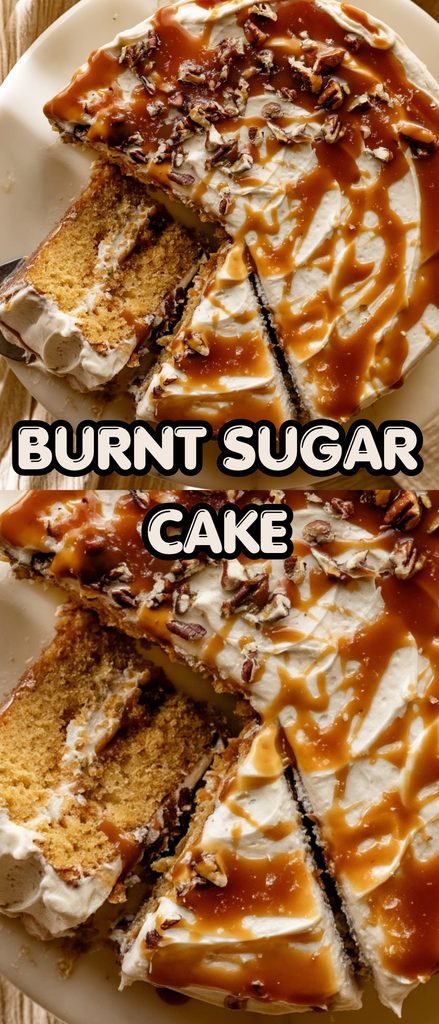
If you love desserts with deep caramel flavor, this Burnt Sugar Cake is one to add to your baking list. It features soft, fluffy cake layers infused with homemade burnt sugar syrup, a creamy burnt sugar frosting, and a generous drizzle of salted caramel between the layers. Toasted pecans add an optional crunchy finish that makes every slice feel extra special.
The secret to this cake is the homemade burnt sugar syrup. Granulated sugar is melted until it reaches a deep amber color, then carefully combined with boiling water to create a rich, toasted caramel flavor. It gives the cake its beautiful golden-brown color and distinctive taste without making it taste overly sweet.
This is a lovely cake for birthdays, holidays, family gatherings, or whenever you want a homemade dessert that feels a little more special. Although there are several steps, you can prepare the syrup and salted caramel ahead of time to make assembly easier.
Why You’ll Love This Burnt Sugar Cake
- Deep caramel flavor: Homemade burnt sugar syrup gives the cake and frosting a rich, toasted sweetness with a subtle bittersweet finish.
- Soft and fluffy layers: Cake flour, egg whites, sour cream, and careful mixing create a tender, delicate crumb.
- Creamy homemade frosting: Burnt sugar frosting carries the same caramel flavor throughout the cake.
- A delicious salted caramel center: A layer of salted caramel between the cake layers adds extra richness and a wonderful gooey texture.
- Perfect for special occasions: With two beautiful layers, smooth frosting, caramel drizzle, and optional toasted pecans, this cake makes an impressive dessert.
Ingredients You’ll Need
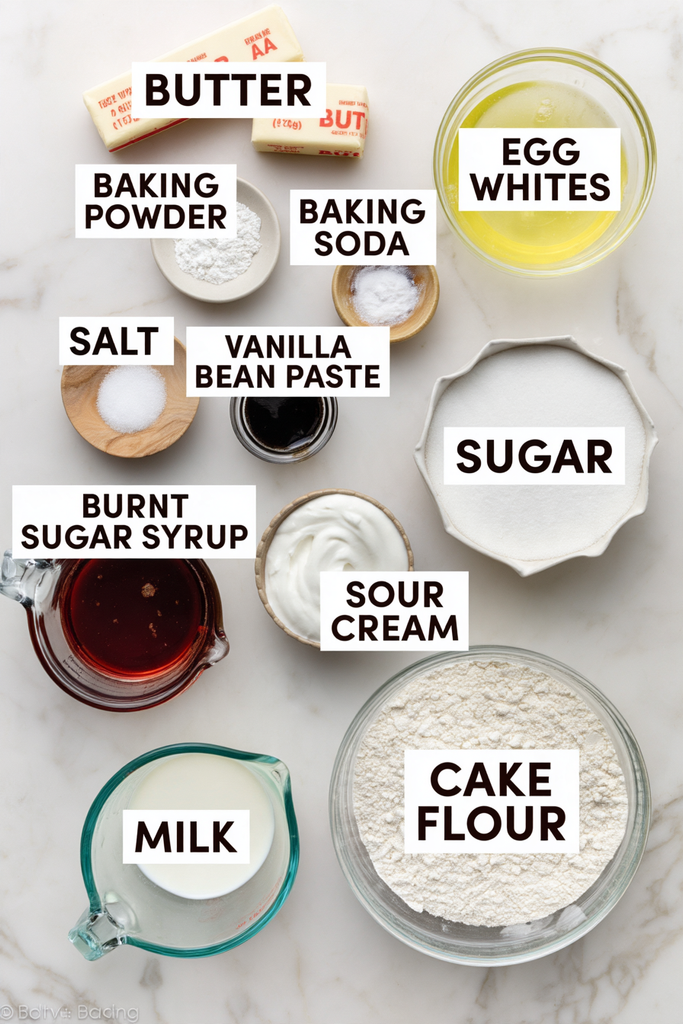
This recipe uses three main components: burnt sugar syrup, the cake, and the frosting. Salted caramel and toasted pecans finish the cake.
For the Burnt Sugar Syrup
- Granulated sugar: One cup of sugar is melted until deep amber to create the cake’s signature flavor.
- Boiling water: Carefully added to the melted sugar to create a pourable syrup. It also helps stop the caramel from becoming too thick as it cools.
For the Cake
- Cake flour: Gives the cake a softer, finer crumb than all-purpose flour. Spoon and level it when measuring for the best results.
- Baking powder and baking soda: Work together to help the cake rise and stay light.
- Salt: Balances the sweetness and brings out the toasted sugar flavor.
- Unsalted butter: Adds richness, moisture, and structure. Make sure it is softened to room temperature.
- Granulated sugar: Sweetens the cake and creams with the butter to create a light base.
- Egg whites: Four large egg whites help create the cake’s fluffy texture. Avoid adding the yolks.
- Sour cream: Adds moisture and a little tanginess while keeping the crumb tender.
- Pure vanilla extract: Complements the caramel flavor.
- Whole milk: Helps bring the batter together and keeps the cake moist.
- Cooled burnt sugar syrup: The key flavoring ingredient that gives the cake its deep golden color and distinctive taste.
For the Burnt Sugar Frosting
- Unsalted butter: Creates a rich, creamy base for the frosting.
- Confectioners’ sugar: Sweetens and thickens the frosting while giving it a smooth texture.
- Cooled burnt sugar syrup: Adds the signature toasted caramel flavor.
- Pure vanilla extract: Rounds out the flavor.
- Whole milk or heavy cream: Adjusts the frosting to a smooth, spreadable consistency.
- Salt: Balances the sweetness and enhances the caramel notes.
For Assembly
- Homemade salted caramel: Adds a rich, buttery caramel layer between the cakes and makes a beautiful finishing drizzle.
- Chopped toasted pecans (optional): Bring a little crunch and a nutty flavor that pair wonderfully with the caramel.
How to Make Burnt Sugar Cake
There are a few steps to this recipe, but preparing the syrup and salted caramel ahead of time makes the process much easier. Read through the instructions before beginning, and allow enough time for the syrup, cake layers, and assembled cake to cool and set.
Step 1: Prepare the Burnt Sugar Syrup
Add the granulated sugar to a medium heavy-bottomed saucepan over medium heat. Stir constantly with a wooden spoon until the sugar melts completely and turns a deep amber color, about 8–10 minutes.
If the sugar forms clumps, gently break them up with the spoon as it melts. A candy thermometer is optional; the sugar should reach approximately 300°F (149°C).
Reduce the heat to low. Very carefully and slowly drizzle in the boiling water, adding just a little at a time and stirring after each addition. The mixture will bubble and sizzle vigorously, so stand back and keep your hands and face away from the steam.
Once all the water has been added, continue cooking the syrup over low heat for another 3 minutes, stirring constantly. Remove the saucepan from the heat and let the syrup cool completely.
You should have approximately one cup of burnt sugar syrup. It must be completely cool before being added to the cake batter or frosting.
Step 2: Prepare the Cake Pans and Dry Ingredients
Preheat the oven to 350°F (177°C).
Grease two 9-inch round cake pans. Line the bottoms with parchment paper rounds, then grease the parchment paper as well. This helps the cakes release cleanly after baking.
In a medium bowl, whisk together the cake flour, baking powder, baking soda, and salt. Set aside.
Step 3: Make the Cake Batter
In a large mixing bowl, beat the softened butter and granulated sugar with a handheld or stand mixer fitted with a paddle attachment. Mix on medium-high speed for about 3 minutes, until the mixture looks light and creamy. Scrape down the sides of the bowl as needed.
Add the egg whites and beat on medium-high speed for approximately 2 minutes, until combined.
Mix in the sour cream and vanilla extract for about 1 minute. Scrape the sides and bottom of the bowl to make sure everything is evenly incorporated.
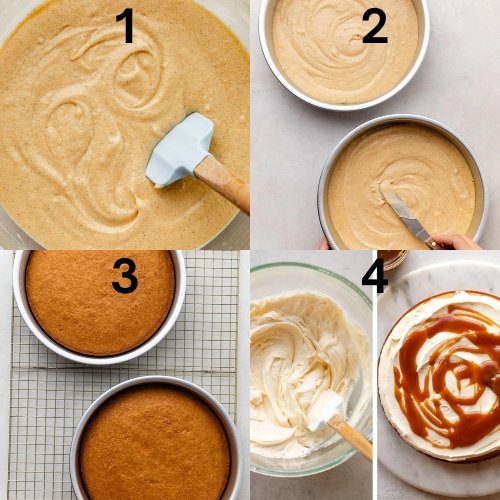
Add the dry ingredients. With the mixer running on low speed, slowly pour in the milk, followed by 1/2 cup of the cooled burnt sugar syrup. Mix just until the ingredients are combined.
If you notice lumps at the bottom of the bowl, gently whisk the batter by hand. Avoid overmixing, as this can make the cake dense.
The batter will be slightly thick. Divide it evenly between the prepared cake pans.
Step 4: Bake the Cake Layers
Bake for 22–25 minutes, or until the cakes are baked through.
The burnt sugar syrup gives the layers a deep golden-brown color, so don’t rely on color alone to determine whether they are done. Insert a toothpick into the center of each cake. If it comes out clean, the cakes are ready.
Place the pans on a cooling rack and allow the cakes to cool completely before removing them and assembling the cake.
Step 5: Prepare the Salted Caramel and Pecans
While the cake layers cool, prepare the homemade salted caramel if you haven’t made it ahead of time.
Allow the caramel to cool until it is no longer warm and has a thick but drizzleable consistency. If it has been refrigerated and becomes too firm, warm it in the microwave in 5–10-second intervals, stirring between each interval until it is pourable.
If you’re using pecans, preheat the oven to 300°F (149°C). Spread the chopped pecans in a single layer on a parchment-lined or silicone-lined baking sheet.
Toast for 5–7 minutes, until slightly darkened and fragrant. Let them cool completely before using.
Step 6: Make the Burnt Sugar Frosting
Add the softened butter to a large mixing bowl. Beat on medium speed for 1–2 minutes, until creamy.
Add the confectioners’ sugar, 1/4 cup of cooled burnt sugar syrup, vanilla extract, milk or heavy cream, and salt.
Beat on low speed for about 30 seconds to prevent the powdered sugar from flying out of the bowl. Increase the mixer speed to high and beat for approximately 2 minutes, until the frosting is smooth and fully combined.
Adjust the consistency as needed. Add a little more confectioners’ sugar if the frosting is too thin, or a small amount of milk or cream if it is too thick. Taste and add more salt if desired.
Step 7: Assemble the Cake
Once the cake layers are completely cool, use a large serrated knife or cake leveler to trim a thin layer from the tops. This creates flat surfaces for stacking.
Place the first cake layer on a cake stand, turntable, or serving plate. Spread 3/4–1 cup of burnt sugar frosting evenly over the top.
Drizzle approximately 1/4 cup of salted caramel over the frosting, keeping it evenly distributed.
Place the second cake layer on top. Refrigerate the assembled cake for 30–45 minutes so the caramel filling has time to set.
After chilling, spread the remaining frosting over the top and sides of the cake. Use a large icing spatula to smooth the frosting, and a bench scraper if you want neat, even sides.
Finish with an extra drizzle of salted caramel and a sprinkle of toasted pecans, if using.
Slice and serve!
Tips for Making the Best Burnt Sugar Cake
- Make the burnt sugar syrup ahead: It needs time to cool completely before you can use it. You can prepare it up to three days in advance.
- Be careful when adding water to hot sugar: The mixture bubbles and splatters rapidly. Use a deep, heavy-bottomed saucepan, keep your face and hands away, and add the boiling water very slowly over low heat.
- Use room-temperature ingredients: Butter, egg whites, sour cream, and milk should be at room temperature. This helps the batter combine evenly and prevents lumps.
- Don’t substitute whole eggs for the egg whites: The egg whites are important for the cake’s light, fluffy texture.
- Measure cake flour correctly: Spoon it into your measuring cup and level the top instead of scooping directly from the bag. Too much flour can make the cake heavy.
- Avoid overmixing: Once the flour is added, mix only until the ingredients are combined. Overmixing can develop too much gluten and make the cake less tender.
- Cool the syrup completely: Warm syrup can affect the consistency of the batter and frosting. Let it cool before measuring it into either mixture.
- Let the caramel cool before assembling: Warm caramel can make the frosting soft and cause the cake layers to slide.
- Chill before frosting the outside: The 30–45-minute chill helps the caramel filling set and makes the cake easier to finish.
Equipment Needed
You don’t need complicated baking equipment, but a few basic tools make this cake easier to prepare and assemble.
- Heavy-bottomed medium saucepan
- Wooden spoon
- Candy thermometer (optional)
- Two 9-inch round cake pans
- Parchment paper
- Mixing bowls
- Whisk
- Handheld or stand mixer with paddle attachment
- Silicone spatula
- Cooling rack
- Serrated knife or cake leveler
- Cake stand or serving plate
- Cake turntable (optional)
- Large icing spatula
- Bench scraper (optional)
- Cake carrier for storage
Recipe Variations
The classic two-layer version has the recommended cake thickness and texture, but you can adapt the recipe for different occasions and serving styles.
1. Three-Layer Burnt Sugar Cake
For a taller cake with thinner layers, divide the batter between three greased and lined 8-inch round cake pans. Bake for approximately 20–22 minutes, or until a toothpick inserted into the center comes out clean.
Allow the layers to cool completely before stacking with frosting and salted caramel.
2. Burnt Sugar Sheet Cake
For a simpler dessert that’s easy to serve at gatherings, bake the batter in a greased and lightly floured 9×13-inch pan.
Bake for approximately 40 minutes, checking for doneness with a toothpick. Once completely cool, spread a thick layer of burnt sugar frosting over the top and finish with salted caramel.
3. Burnt Sugar Cupcakes
Turn the batter into individual cupcakes for parties, celebrations, or bake sales. This recipe makes approximately 30–36 cupcakes.
Line muffin pans with cupcake liners and fill each one about two-thirds full. Bake for 20–22 minutes, or until a toothpick inserted into the center comes out clean.
Once cooled, pipe or spread the burnt sugar frosting over each cupcake and finish with a little salted caramel.
4. Burnt Sugar Cake with Extra Pecans
For more crunch, add toasted chopped pecans between the cake layers along with the salted caramel. Sprinkle additional pecans over the frosted cake for a nutty finish.
5. Burnt Sugar Cake with Yogurt
If you don’t have sour cream, plain yogurt can be used as a substitute. The cake may be slightly less rich, but it will still have a tender texture and delicious burnt sugar flavor.
What to Serve with Burnt Sugar Cake
This cake is rich and flavorful, so it pairs nicely with simple drinks and lighter accompaniments.
- Coffee or espresso: The slightly bitter flavor of coffee balances the sweetness of the caramel frosting.
- Hot tea: Black tea or a lightly spiced tea makes a lovely afternoon pairing.
- Fresh berries: Strawberries, raspberries, or blueberries add a bright, fruity contrast.
- Vanilla ice cream: A scoop of cold vanilla ice cream alongside a slice of cake makes an especially delicious dessert.
- Extra salted caramel: Serve a little caramel on the side for anyone who wants an even richer slice.
Frequently Asked Questions
What does burnt sugar cake taste like?
Burnt sugar cake has a deep, toasted caramel flavor with a subtle bittersweet edge. The syrup adds warmth and richness to the cake and frosting without making the dessert taste charred. Salted caramel brings extra buttery sweetness, while the optional pecans add a nutty finish.
Can I make the burnt sugar syrup ahead of time?
Yes! The burnt sugar syrup can be prepared up to three days ahead. Let it cool completely, then cover and store it at room temperature until you’re ready to bake.
Why does this recipe use egg whites instead of whole eggs?
Egg whites help give the cake its soft, fluffy texture. Using whole eggs instead can change the texture, so it’s best to follow the recipe and use four large egg whites.
Can I make Burnt Sugar Cake ahead of time?
Absolutely. You can prepare the syrup up to three days ahead and the salted caramel up to one week ahead. The baked and cooled cake layers can be wrapped tightly and refrigerated for up to two days or frozen for up to three months.
You can also freeze the fully frosted cake for up to three months. Thaw it overnight in the refrigerator, then bring it to room temperature before adding the final caramel drizzle and pecans.
How should I store leftover Burnt Sugar Cake?
Cover the leftover cake tightly and store it in the refrigerator for up to five days. A cake carrier works well for keeping it covered and protected.
Can I make this recipe without salted caramel?
Yes. The cake and frosting already have plenty of burnt sugar flavor, so you can leave out the salted caramel if you prefer. However, the caramel filling adds an extra layer of richness and makes the finished cake especially delicious.
Can I use this recipe to make cupcakes or a sheet cake?
Yes. The batter makes approximately 30–36 cupcakes, which bake for 20–22 minutes. You can also bake it in a 9×13-inch pan for approximately 40 minutes. For the best cake texture, though, the original two-layer version is recommended.
Final Thoughts
This Burnt Sugar Cake is a beautiful homemade dessert for anyone who loves the rich flavor of caramel. The tender cake layers, creamy burnt sugar frosting, and salted caramel filling come together to create a cake that’s both comforting and impressive.
Preparing the syrup and caramel ahead of time makes the process much more manageable, and the finished cake is well worth the effort. Serve it for a birthday, holiday gathering, or weekend celebration, and don’t forget the extra caramel drizzle!
If you make this recipe, leave a comment and rating to share how it turned out. I’d love to hear whether you finished yours with toasted pecans or kept it simple with extra salted caramel.