

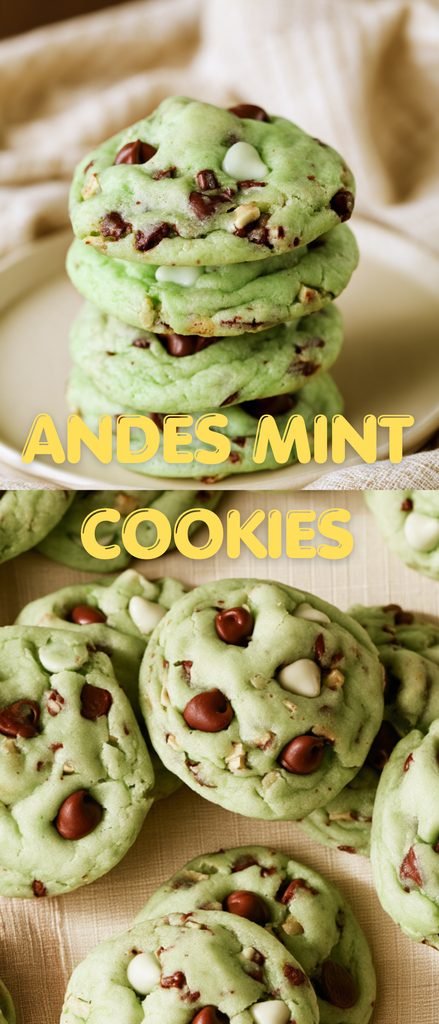
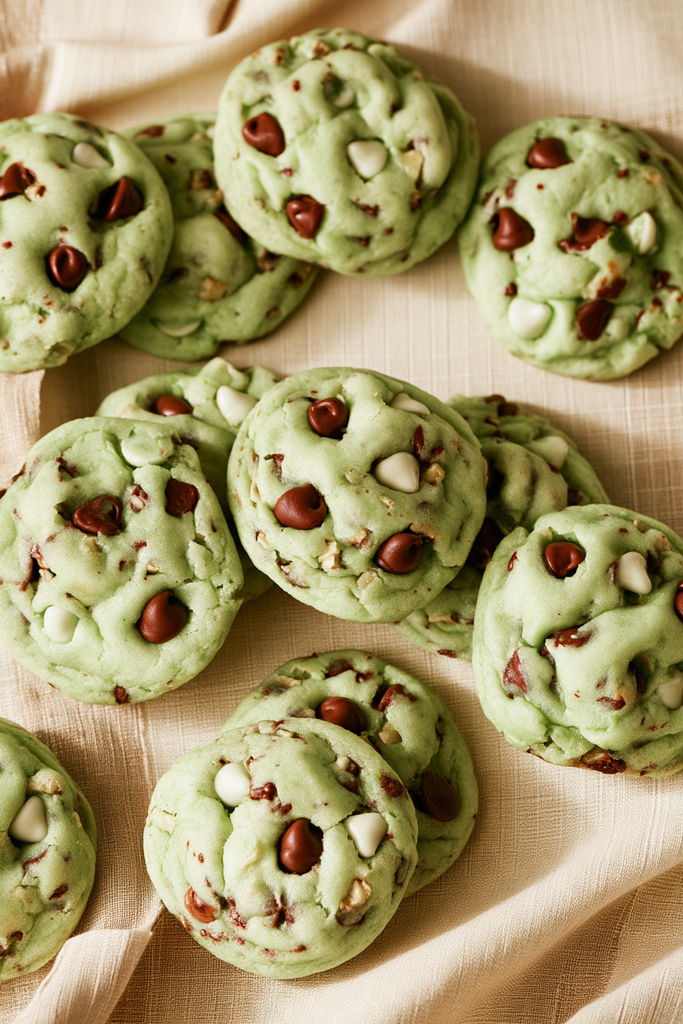
If you love the refreshing combination of mint and chocolate, these Andes Mint Cookies are a must-bake! Made with a simple white or vanilla cake mix, these soft green cookies are packed with Andes mint pieces, dark chocolate chips, and mint chocolate chips. Every bite delivers a delicious mix of sweet chocolate and cool mint flavor.
These cookies are especially fun for holiday baking, Christmas cookie exchanges, and St. Patrick’s Day celebrations. Their cheerful green color makes them stand out on any dessert table, while the cake mix base keeps preparation simple and fuss-free.
With just a handful of ingredients and a little chilling time, you can make a batch of 30 bakery-style cookies that look festive and taste wonderful. Whether you’re sharing them with friends or enjoying one with a cup of hot cocoa, these Andes Mint Cookies are sure to become a favorite.
Why You’ll Love This Recipe
- Easy to make: A boxed cake mix makes the dough simple to prepare without measuring several dry ingredients.
- Soft and chewy: The cookies have tender centers and lightly set edges.
- Mint chocolate flavor: Andes mint pieces, dark chocolate chips, and mint chocolate chips create a delicious combination.
- Festive green color: A little green food coloring gives these cookies a fun look for holiday celebrations.
- Perfect for sharing: This recipe makes approximately 30 cookies, making it great for parties, cookie trays, and gifting.
Ingredients You’ll Need
You only need a few everyday baking ingredients and some delicious mint chocolate additions to make these cookies.
- White or vanilla cake mix: One 15.25-ounce box forms the base of the cookie dough and keeps the recipe quick and convenient.
- Large eggs: Two eggs help bind the ingredients together and give the cookies structure.
- Cooking oil: Canola or vegetable oil adds moisture and helps create a soft cookie texture.
- Green food coloring: Gel food coloring is recommended because a small amount provides a noticeable color. Start with one or two drops and add more gradually if needed.
- Andes mint pieces: These provide the signature chocolate-mint flavor throughout the cookies.
- Dark chocolate chips: A quarter cup adds rich chocolate flavor to balance the sweetness.
- Mint chocolate chips: Another quarter cup adds extra minty chocolate goodness. Keep a few additional chips handy for decorating the warm cookies if desired.
How to Make Andes Mint Cookies
These cake mix cookies come together with a few simple steps. The most important part is allowing the dough to chill before baking.
Step 1: Combine the Cake Mix, Eggs, and Oil
Add the white or vanilla cake mix, eggs, and cooking oil to a large mixing bowl. Stir until the ingredients are thoroughly combined and a thick cookie dough forms.
Step 2: Add the Green Food Coloring
Slowly add the green food coloring, starting with one or two drops. Mix until the color is evenly distributed.
Add more coloring a little at a time if you want a deeper green shade. Keep in mind that the color can intensify as the dough chills, so it’s best not to add too much at once.
Step 3: Fold in the Chocolate
Gently fold the Andes mint pieces, dark chocolate chips, and mint chocolate chips into the dough. Distribute the chocolate evenly so every cookie gets plenty of minty goodness.
Step 4: Chill the Dough
Cover the bowl and refrigerate the dough for at least one hour. Two hours is even better if you have the time.
Chilling helps the dough firm up, making it easier to scoop and shape. It also gives the green coloring time to develop.
Step 5: Prepare the Baking Sheets
Once the dough has chilled for at least an hour, preheat your oven to 350°F.
Line a couple of baking sheets with parchment paper and set them aside. This helps prevent sticking and makes cleanup easier.
Step 6: Shape the Cookies
Scoop approximately two tablespoons of dough for each cookie. Roll the portions into balls, then shape them slightly oblong so they stand taller than they are wide.
Arrange the dough portions on the prepared baking sheets, leaving about two inches between each cookie to allow room for spreading.
Step 7: Bake the Cookies
Bake for 7–9 minutes, or until the edges are set.
The centers may still look slightly soft when you remove the cookies from the oven. That’s expected, so avoid leaving them in longer just to make the centers look completely firm. The cookies will continue setting as they cool.
Step 8: Add Extra Chocolate
If desired, gently press a few extra dark or mint chocolate chips into the tops of the warm cookies before they set. This adds an attractive finish and makes the chocolate pieces more visible.
Step 9: Cool and Store
Let the cookies cool on the baking sheet for 3–5 minutes. Carefully transfer them to a wire rack to finish cooling.
Once completely cooled, store the cookies in an airtight container at room temperature for up to four days.
Tips for Success
A few simple tips will help you get soft, flavorful cookies with a beautiful green color.
- Use gel food coloring: Gel coloring gives you more color with fewer drops. Add it gradually until you reach your preferred shade.
- Remember that the color can deepen: The green may become more intense while the dough chills, so start with a small amount of coloring.
- Don’t skip chilling: Refrigerating the dough for at least one hour helps it become easier to handle and shape.
- Chill for two hours when possible: The recipe recommends two hours for the best preparation experience.
- Keep the dough portions consistent: Using approximately two tablespoons per cookie helps them bake more evenly.
- Shape the dough taller than it is wide: Slightly oblong dough portions help create taller-looking cookies.
- Don’t overbake: Remove the cookies when the edges are set, even if the centers still look a little soft.
- Add extra chocolate while warm: Pressing a few additional chips into the tops before the cookies set gives them a pretty bakery-style appearance.
Equipment Needed
You don’t need any special baking equipment for this recipe. Gather these basic kitchen tools before getting started:
- Large mixing bowl
- Measuring cups and spoons
- Mixing spoon or silicone spatula
- Cookie scoop or tablespoon
- Baking sheets
- Parchment paper
- Wire cooling rack
- Refrigerator for chilling the dough
Recipe Variations
There are several ways to customize these cookies while keeping their delicious mint chocolate theme.
1. White Chocolate Andes Mint Cookies
Swap the dark chocolate chips for white chocolate chips. The creamy sweetness pairs beautifully with the refreshing mint flavor and creates a pretty contrast against the green dough.
2. Extra Chocolate Mint Cookies
For a richer chocolate flavor, use chocolate cake mix instead of white or vanilla cake mix. This is an optional variation that will give the cookies a darker appearance and a more pronounced chocolate taste.
3. Festive Holiday Cookies
Add red and white sprinkles to the dough or press a few onto the warm cookies after baking. The colorful decorations make these cookies especially fun for Christmas dessert trays.
4. St. Patrick’s Day Cookies
Keep the green dough and add green, white, or gold sprinkles for a festive St. Patrick’s Day treat. You can also adjust the food coloring to create a brighter or softer shade of green.
5. Double Mint Chocolate Cookies
If you love a stronger mint flavor, increase the amount of mint chocolate chips slightly while keeping the overall dough consistency in mind. You can also use extra Andes mint pieces for more chocolate-mint flavor in every bite.
Serving Suggestions
These Andes Mint Cookies are delicious on their own, but they’re also easy to include in a festive dessert spread.
- Christmas cookie trays: Add them to a platter with sugar cookies, gingerbread cookies, and chocolate crinkle cookies.
- Holiday parties: Their bright green color makes them a fun addition to Christmas gatherings and seasonal celebrations.
- St. Patrick’s Day desserts: Serve them alongside other green treats for a cheerful themed dessert table.
- Coffee break: Enjoy one with a cup of coffee for a sweet afternoon treat.
- Hot chocolate pairing: Serve them with warm hot chocolate for a cozy winter dessert.
- Ice cream dessert: Crumble a cookie over vanilla or chocolate ice cream for an easy mint chocolate topping.
Frequently Asked Questions
Why do I need to chill the cookie dough?
Chilling the dough for at least one hour helps it firm up, making it easier to scoop and shape. The recipe recommends chilling for two hours when possible. It also gives the green coloring time to intensify.
Can I use chocolate cake mix instead of white or vanilla cake mix?
Yes, you can try chocolate cake mix as an optional variation. The cookies will have a richer chocolate flavor and a darker color, but the overall mint chocolate combination will still be delicious.
Can I make these cookies without green food coloring?
Absolutely! The food coloring is mainly for appearance and doesn’t provide the mint flavor. You can leave it out if you prefer cookies without the green color.
Why do my cookies look soft in the middle after baking?
These cookies are meant to look slightly soft in the center when they come out of the oven. As long as the edges are set, they can be removed from the oven. They’ll continue to firm up while cooling on the baking sheet.
How long do Andes Mint Cookies stay fresh?
Store completely cooled cookies in an airtight container at room temperature for up to four days.
Can I prepare the cookie dough ahead of time?
Yes. You can prepare the dough and refrigerate it before baking. The recipe recommends chilling for at least one hour, preferably two hours. Keep the dough covered while it chills.
Final Thoughts
These Andes Mint Cookies are an easy and festive way to enjoy the classic combination of mint and chocolate. With a simple cake mix base, plenty of chocolate pieces, and a cheerful green color, they’re perfect for holiday baking, parties, or whenever you’re craving a soft homemade cookie.
The best part is how little effort they take. Chill the dough, scoop, bake, and enjoy!
Give this recipe a try, and don’t forget to share how your cookies turned out. They’re a fun treat to bake, serve, and share with anyone who loves mint chocolate desserts.
Print
Andes Mint Cookies: Soft, Chewy, and Full of Mint Chocolate
- Total Time: 1 hour, 14 minutes
- Yield: 30 cookies
Description
Andes Mint Cookies are soft, chewy green cake mix cookies filled with Andes mint pieces, dark chocolate chips, and mint chocolate chips. These easy mint chocolate cookies are chilled before baking for a deliciously rich and festive treat.
Ingredients
- 1 box (15.25 ounces) white or vanilla cake mix
- 2 large eggs
- 1/2 cup cooking oil (canola or vegetable oil)
- Green food coloring (1–2 drops of mint green gel coloring, or as needed)
- 1 cup Andes mint pieces
- 1/4 cup dark chocolate chips, plus extra for topping if desired
- 1/4 cup mint chocolate chips, plus extra for topping if desired
Instructions
- In a large mixing bowl, combine the cake mix, eggs, and cooking oil. Stir until well combined.
- Gradually add the green food coloring, 1–2 drops at a time, until the desired color is reached. Keep in mind that the color may intensify as the dough chills.
- Fold in the Andes mint pieces, dark chocolate chips, and mint chocolate chips.
- Cover the dough and refrigerate for at least 1 hour, preferably 2 hours.
- After the dough has chilled, preheat the oven to 350°F.
- Line baking sheets with parchment paper.
- Scoop the dough into balls, using about 2 tablespoons per cookie. Shape them slightly oblong so they stand taller than they are wide.
- Arrange the dough balls on the prepared baking sheets, spacing them about 2 inches apart.
- Bake for 7–9 minutes. The centers may look slightly soft, but the edges should be set.
- If desired, gently press a few extra chocolate chips into the tops of the warm cookies before they set.
- Let the cookies cool on the baking sheet for 3–5 minutes, then transfer them to a wire rack to cool completely.
- Store cooled cookies in an airtight container at room temperature for up to 4 days.
Notes
- Chilling the dough: Chill for at least 1 hour, although 2 hours is preferred. This helps the dough firm up before baking.
- Food coloring: Gel food coloring works well. Add it gradually because the color can become more intense as the dough chills.
- Cookie shaping: Use approximately 2 tablespoons of dough per cookie and shape slightly oblong for taller cookies.
- Chocolate topping: Press additional dark or mint chocolate chips into the warm cookies immediately after baking, if desired.
- Storage: Keep cookies in an airtight container at room temperature for up to 4 days.
- Yield: Makes approximately 30 cookies.
- Prep Time: 5 minutes
- Cook Time: 9 minutes
- Category: Dessert, Cookies
- Method: Baking
- Cuisine: American