

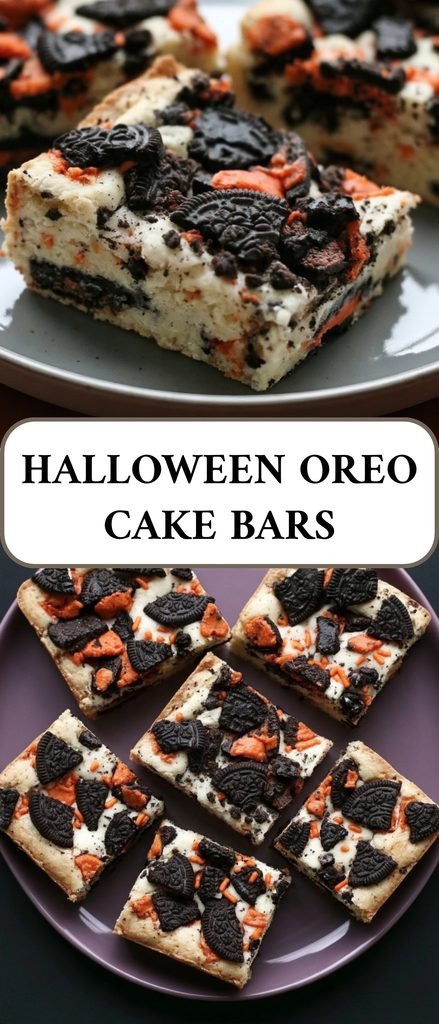
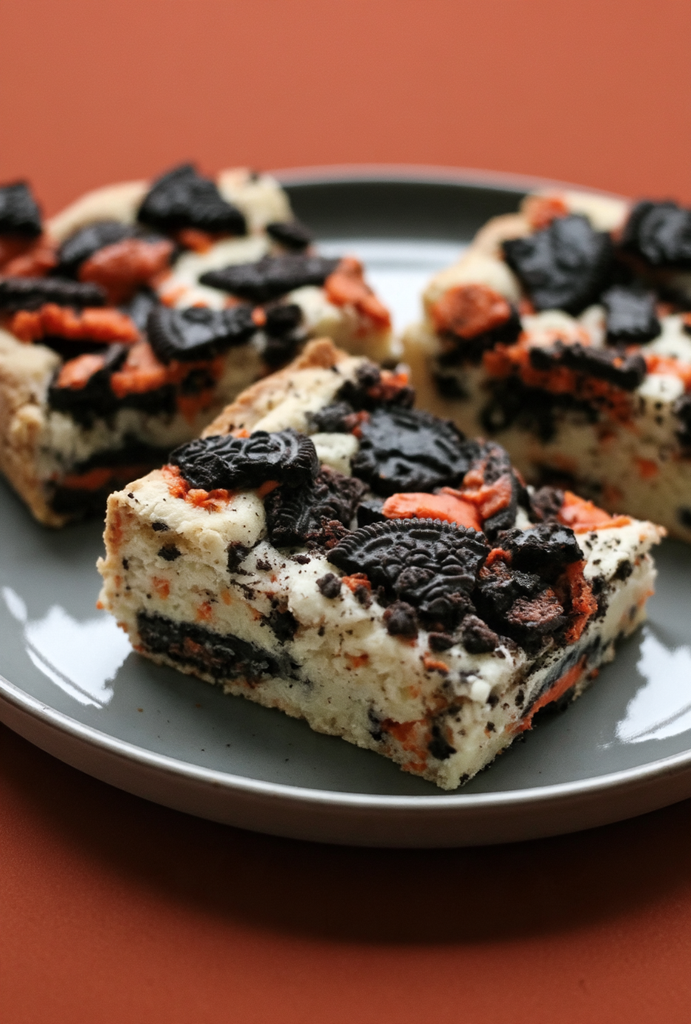
These Halloween Oreo Cake Bars are the perfect easy treat for spooky season! Made with a soft, chewy vanilla cake mix base, chunky pieces of Halloween Oreos, and festive orange-and-black sprinkles, these bars are packed with fun Halloween flavor in every bite.
The best part? You only need a handful of simple ingredients and about 15 minutes of prep time. There’s no need to make cake batter from scratch or fuss with frosting. Just layer the cookies, spread the thick vanilla batter, add more Oreos and sprinkles, and bake!
These Halloween cake bars are perfect for Halloween parties, school celebrations, fall bake sales, or a fun weekend baking project with the family. Cut them into squares, arrange them on a platter, and you’ve got a festive dessert everyone will love.
Why You’ll Love These Halloween Oreo Cake Bars
- Easy to make: A boxed cake mix keeps the recipe simple and saves time.
- Full of Oreo goodness: Chopped Halloween Oreos are layered throughout the bars and scattered on top.
- Soft and chewy: The thick cake batter bakes into tender, delicious cake bars.
- Festive and colorful: Orange-and-black sprinkles make them instantly ready for Halloween.
- Great for sharing: One 9-inch pan makes 12 dessert bars, perfect for parties and gatherings.
Ingredients You’ll Need
You only need a few everyday baking ingredients to make these Halloween Oreo bars.
For the Cake Bars
- Vanilla or French vanilla cake mix: One standard 15.25-ounce (430 g) box creates the base of the bars. Either flavor works beautifully.
- Large eggs: Two eggs help bind the ingredients together and give the bars structure.
- Whole milk: Adds moisture and richness to the cake batter.
- Canola or vegetable oil: Keeps the bars soft and tender.
- Halloween Oreo cookies: You’ll need 18 cookies, coarsely chopped. Half go on the bottom of the pan, while the rest are scattered over the top.
- Orange-and-black Halloween sprinkles: These add festive color and a little crunch.
- Nonstick cooking spray: Helps prevent sticking and makes spreading the thick batter easier.
Equipment Needed
- 9-inch square metal baking pan
- Parchment paper
- Large mixing bowl
- Offset spatula or silicone spatula
- Toothpick
- Sharp knife
How to Make Halloween Oreo Cake Bars
Step 1: Prepare the Oven and Pan
Preheat your oven to 350°F (175°C).
Line a 9-inch square metal baking pan with two crossing strips of parchment paper. Leave at least 2 inches of overhang on opposite sides so you can easily lift the baked bars out later.
Lightly spray any exposed areas of the pan with nonstick cooking spray.
Step 2: Add the Bottom Oreo Layer
Coarsely chop the Halloween Oreo cookies into chunky, uneven pieces. You want noticeable cookie pieces rather than fine crumbs.
Scatter half of the chopped Oreos evenly across the bottom of the prepared baking pan. This creates a delicious cookie layer underneath the soft vanilla cake bars.
Step 3: Make the Cake Batter
In a large mixing bowl, combine the vanilla cake mix, eggs, whole milk, canola or vegetable oil, and 1 tablespoon of the Halloween sprinkles.
Mix until everything is combined and no dry streaks remain.
The batter will be thick, and that’s exactly how it should be. Avoid adding extra milk, even if the mixture seems thicker than regular cake batter.
Step 4: Spread the Batter Over the Oreos
Dollop the thick batter over the bottom Oreo layer rather than pouring it all in one spot.
Lightly spray an offset spatula or silicone spatula with nonstick cooking spray. Gently spread the batter toward the corners of the pan, taking care not to shift the Oreo pieces underneath.
This method helps keep the cookie layer evenly distributed throughout the bars.
Step 5: Add the Remaining Oreos and Sprinkles
Scatter the remaining chopped Halloween Oreos over the top of the batter.
Add the remaining tablespoon of orange-and-black sprinkles, distributing them evenly across the surface.
Lightly press the Oreo pieces into the batter, but leave some pieces partially exposed. This gives the finished bars a chunky, colorful look.
Step 6: Bake the Cake Bars
Bake uncovered for 20–25 minutes, checking at the 20-minute mark.
The edges should look lightly golden, and the center should be set.
To check for doneness, insert a toothpick into a cake-only area near the center of the pan. It should come out clean or with a few moist crumbs, but no wet batter.
Avoid testing directly through an Oreo piece or cookie pocket, as this can make it difficult to tell whether the cake is fully baked.
Step 7: Cool Completely
Remove the pan from the oven and place it on a cooling rack.
Let the cake bars cool completely in the pan for 45–60 minutes. Cooling is important because it allows the bars to firm up, making them much easier to lift and slice.
Step 8: Slice and Serve
Once completely cool, use the parchment paper overhang to lift the entire slab out of the pan.
Transfer it to a cutting board and slice into 12 squares or rectangles using a sharp knife. Wipe the knife between cuts for cleaner edges.
Serve and enjoy your festive Halloween Oreo Cake Bars!
Tips for the Best Halloween Oreo Cake Bars
- Keep the Oreo pieces chunky: Coarsely chopped cookies give the bars more texture and make the Oreo layer stand out. Avoid crushing them into fine crumbs.
- Don’t thin the batter: The batter should be thick. Adding extra milk can change the texture and make it harder to spread.
- Dollop before spreading: Placing spoonfuls of batter over the bottom Oreo layer helps prevent the cookies from moving around.
- Spray your spatula: A light coating of nonstick cooking spray makes spreading the thick batter much easier.
- Check the right spot for doneness: Test a cake-only section near the center rather than inserting the toothpick into an Oreo pocket.
- Let the bars cool completely: Cutting them while warm can make them fall apart. Give them time to set before slicing.
- Watch the baking time: Start checking at 20 minutes because oven temperatures and pans can affect how quickly the bars bake.
Variations and Substitutions
These Halloween Oreo Cake Bars are easy to customize with different cake mixes and cookies.
Funfetti Halloween Cake Bars
Use Halloween funfetti cake mix instead of vanilla or French vanilla. If the mix already contains plenty of colorful sprinkles, reduce or omit the additional sprinkles in the batter.
Regular Oreo Cake Bars
Can’t find Halloween Oreos? Regular Oreos work just as well. Keep the orange-and-black sprinkles to maintain that classic Halloween look.
Change the Sprinkle Colors
You can use different sprinkle combinations to make these bars suitable for other celebrations. Try red and green for Christmas, pastel colors for Easter, or colorful confetti sprinkles for birthdays.
Try Different Oreo Flavors
If you want to experiment, try another Oreo variety that pairs well with vanilla cake. Just keep the cookies in chunky pieces so you still get that delicious cookie texture.
How to Store Halloween Oreo Cake Bars
Once the bars have cooled completely, store them in an airtight container at room temperature for up to 1 week.
For the best texture and appearance, enjoy them within the first 3 days.
Can You Freeze Halloween Oreo Cake Bars?
Yes! These cake bars freeze well for up to 3 months.
Place parchment paper between the layers to keep the bars from sticking together. Store them in a freezer-safe airtight container.
When you’re ready to serve, thaw them overnight in the refrigerator, then bring them to room temperature before enjoying.
Frequently Asked Questions
Can I use a different cake mix flavor?
Absolutely! Vanilla and French vanilla are great choices, but you can experiment with other cake mix flavors. Halloween funfetti cake mix is especially fun for a seasonal variation.
Why is the batter so thick?
This recipe uses less liquid than a traditional cake mix preparation, creating a thick batter that works well for cake bars. The thicker consistency also helps the batter stay in place over the bottom Oreo layer.
Don’t add extra milk to thin it out.
Should I crush the Oreos or chop them?
Chop them into coarse, uneven pieces. Larger chunks give the bars more Oreo texture and create a prettier appearance. Fine crumbs won’t provide the same chunky cookie layer.
How do I keep the bottom Oreo layer from moving?
Scatter the chopped Oreos evenly across the pan, then dollop the batter over them. Use a lightly greased spatula to gently spread the batter toward the corners instead of pushing it around aggressively.
How do I know when the cake bars are done?
The edges should be lightly golden, and the center should look set. A toothpick inserted into a cake-only area near the center should come out clean or with a few moist crumbs, not wet batter.
Can I use a glass or ceramic baking dish?
Yes, but baking times may vary. If using a glass or ceramic pan, begin checking for doneness around 22 minutes and look for the same visual cues: lightly golden edges and a set center.
Can I make these bars ahead of time?
Yes! These are a great make-ahead dessert. Bake and cool the bars completely, then store them in an airtight container until you’re ready to serve.
When to Serve Halloween Oreo Cake Bars
These festive cake bars are perfect for almost any Halloween celebration. Serve them at:
- Halloween parties and costume gatherings
- School parties and classroom celebrations
- Fall bake sales and potlucks
- Halloween movie nights
- Family dessert tables
- Spooky-season birthday parties
For an easy party presentation, arrange the squares on a platter with extra Halloween sprinkles scattered around them.
Final Thoughts
These Halloween Oreo Cake Bars are everything you want in an easy Halloween dessert: soft vanilla cake, chunky chocolate sandwich cookies, and plenty of festive orange-and-black sprinkles.
With a boxed cake mix and simple ingredients, they’re easy enough to make on a busy day but cute enough to serve at your next Halloween party. Make a batch, let them cool, slice them into squares, and enjoy a fun and delicious treat for spooky season!
Print
Halloween Oreo Cake Bars
- Total Time: 100 minutes
- Yield: 12 bars
Description
These Halloween Oreo Cake Bars are soft, chewy vanilla cake bars layered with chunky Halloween Oreo cookies and topped with orange-and-black sprinkles. Made with a simple boxed cake mix, they are an easy festive dessert for Halloween parties and gatherings.
Ingredients
- 1 standard box vanilla or French vanilla cake mix, about 15.25 ounces (430 g)
- 2 large eggs
- 1/2 cup whole milk (120 g)
- 1/3 cup canola or vegetable oil (70 g)
- 18 Halloween Oreo cookies, coarsely chopped (about 200 g), divided
- 2 tablespoons orange-and-black Halloween sprinkles (about 20 g), divided
- Nonstick cooking spray, as needed
Instructions
- Preheat the oven to 350°F (175°C).
- Line a 9-inch-square metal baking pan with two crossing strips of parchment paper, leaving at least 2 inches of overhang on opposite sides. Lightly spray any exposed pan areas with nonstick cooking spray.
- Scatter half of the chopped Halloween Oreos evenly over the bottom of the prepared pan.
- In a large mixing bowl, combine the cake mix, eggs, milk, oil, and 1 tablespoon of the sprinkles. Mix until no dry streaks remain. The batter should be thick; do not add extra milk.
- Dollop the thick batter over the Oreo layer. Lightly spray an offset or silicone spatula with cooking spray, then gently spread the batter to the corners without disturbing the cookies underneath.
- Scatter the remaining chopped Oreos and sprinkles over the batter. Lightly press the Oreo pieces into the surface, leaving some pieces partly exposed.
- Bake uncovered for 20–25 minutes, checking at 20 minutes. The edges should be lightly golden and the center should look set.
- Test a cake-only area near the center with a toothpick. It should come out clean or with a few moist crumbs, not wet batter.
- Let the cake bars cool completely in the pan for 45–60 minutes.
- Use the parchment overhang to lift the slab from the pan. Transfer to a cutting board and cut into 12 squares or rectangles, wiping the knife between cuts.
Notes
- Keep the Oreo cookies in coarse, uneven pieces rather than crushing them into fine crumbs.
- Dollop the thick batter over the bottom Oreo layer before spreading to help keep the cookies in place.
- Lightly spray the spatula to make spreading the stiff batter easier.
- Check doneness in a cake-only area rather than testing through an Oreo pocket.
- If using a glass or ceramic pan, begin checking for doneness at 22 minutes and look for lightly golden edges and a set center.
- For Funfetti Halloween Bars, use Halloween funfetti cake mix instead of vanilla cake mix. Reduce or omit the added sprinkles if the mix already contains plenty.
- For regular Oreo bars, substitute regular Oreos and keep the orange-and-black sprinkles for a Halloween look.
- Store cooled bars in an airtight container at room temperature for up to 1 week. Their texture and appearance are best within 3 days.
- To freeze, layer the bars with parchment paper and freeze for up to 3 months. Thaw overnight in the refrigerator and serve at room temperature.
- Prep Time: 15 minutes
- Cook Time: 25 minutes
- Category: Dessert, Bars
- Method: Baking
- Cuisine: American