

There’s something irresistible about warm, golden pizza pockets fresh out of the oven—crispy on the outside, gooey and cheesy on the inside, and bursting with your favorite flavors. These Homemade Easy Cheesy Pizza Pockets are the perfect solution for busy weeknights, quick lunches, or fun family cooking sessions. Whether you’re feeding picky eaters or looking for a customizable meal everyone will love, this recipe delivers comfort, convenience, and deliciousness in every bite. Think of them as your personal handheld pizzas—easy to make, even easier to enjoy.
Why You’ll Love This Recipe
- Quick and simple: Ready in just 35 minutes from start to finish
- Customizable: Use your favorite fillings for endless variations
- Family-friendly: Perfect for kids and adults alike
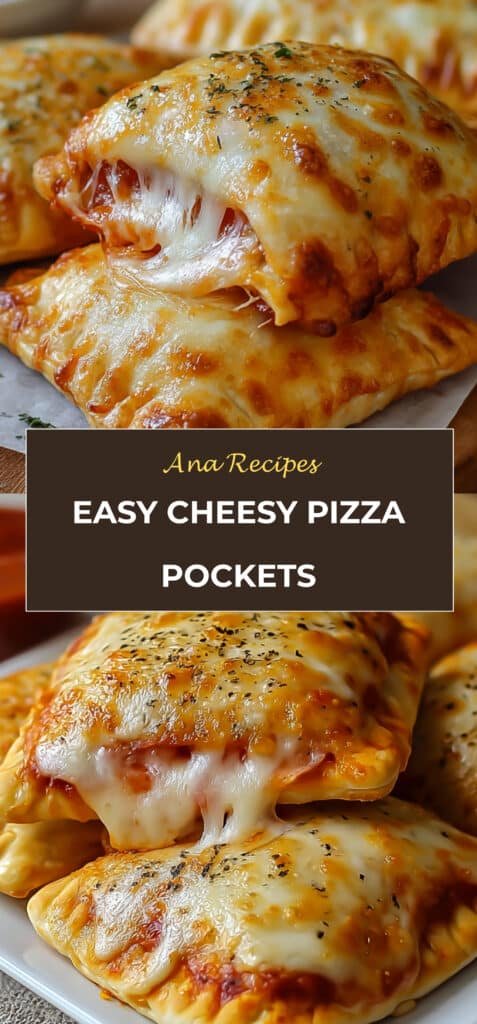
- Crispy and cheesy: Golden crust with a melty, flavorful center
- Great for meal prep: Make ahead and reheat anytime
Ingredients
Dough
- 1 package crescent dough or pizza dough – The base that bakes into a soft yet slightly crispy crust (use gluten-free if needed)
Filling
- 2 cups mozzarella cheese – Melts beautifully for that classic stretchy, cheesy texture (or use cheddar or dairy-free alternatives)
- 1/2 cup marinara sauce – Adds rich tomato flavor and moisture (can swap with pesto or barbecue sauce)
- 1 cup vegetables (optional) – Bell peppers, spinach, or mushrooms for added nutrition and texture
- 1 cup meats (optional) – Pepperoni, turkey ham, or cooked halal sausage for a savory boost
- 1 teaspoon Italian spices (optional) – Enhances flavor with herbs like oregano, basil, or Italian seasoning
How to Make Homemade Easy Cheesy Pizza Pockets
Prep the Dough
Preheat your oven to 375°F (190°C). If you’re using an air fryer, preheat it as well. Roll out the dough on a lightly floured surface and cut it into equal squares or circles. Tip: Keep sizes uniform for even cooking.
Add the Fillings
Place a generous amount of mozzarella cheese on one half of each dough piece. Spoon a little marinara sauce on top, followed by your chosen vegetables and meats. Be careful not to overfill—this helps prevent leaks أثناء baking.
Seal the Pockets
Fold the dough over the filling to create a pocket. Press and crimp the edges with a fork to seal tightly. This step is key to keeping all that cheesy goodness inside.
Cook to Perfection
Place the pockets on a baking sheet lined with parchment paper. Bake for about 15 minutes, or until golden brown. If using an air fryer, cook at 375°F for 8–10 minutes. For extra crispiness, brush the tops with melted butter before baking.
Cool and Serve
Let the pizza pockets cool for a few minutes before serving—the filling will be hot! Serve warm and enjoy the cheesy, savory goodness.
Tips for Success
- Don’t overfill the pockets to avoid tearing or leaking
- Seal edges היטב using a fork or by pinching tightly
- Pre-cook vegetables like mushrooms to reduce excess moisture
- Use shredded cheese for even melting
- Let them rest briefly after baking for better texture
Equipment Needed
- Oven or air fryer
- Baking sheet (or air fryer basket)
- Rolling pin (optional, for dough)
- Knife or pizza cutter
- Fork (for sealing edges)
- Parchment paper (for easy cleanup)
Recipe Variations
- Vegetarian version: Load up with veggies like spinach, olives, and peppers, and skip the meat
- Spicy pizza pockets: Add chili flakes, jalapeños, or spicy sausage
- Low-carb option: Use a low-carb dough alternative or cheese-based crust
- Breakfast pockets: Fill with scrambled eggs, cheese, and turkey sausage
- BBQ chicken twist: Swap marinara for BBQ sauce and use shredded chicken
Serving Suggestions
Serve these easy cheesy pizza pockets with a side of warm marinara for dipping, a crisp green salad, or some roasted vegetables. For a fun presentation, sprinkle with fresh herbs or grated cheese right before serving.
FAQs
Can I make pizza pockets ahead of time?
Yes! Assemble them and store in the fridge for up to 24 hours before baking.
Can I freeze them?
Absolutely. Freeze before or after baking. Reheat in the oven or air fryer for best results.
How do I keep them from getting soggy?
Avoid too much sauce and pre-cook watery vegetables.
Can I use store-bought dough?
Yes, both crescent dough and pizza dough work perfectly for convenience.
What’s the best cheese to use?
Mozzarella is ideal for meltiness, but you can mix in cheddar or other cheeses.
Are these kid-friendly?
Very! Kids love customizing their own fillings and eating these handheld treats.
Conclusion
These homemade easy cheesy pizza pockets are everything you want in a quick, satisfying meal—crispy, gooey, and packed with flavor. They’re perfect for busy days, family dinners, or even casual gatherings. Try them once, and they might just become a regular on your menu. Don’t forget to experiment with your favorite fillings and make them your own!
Print
Homemade Easy Cheesy Pizza Pockets
- Total Time: 35 minutes
- Yield: 4 pockets
- Diet: Halal
Description
These crispy homemade cheesy pizza pockets are a family-favorite comfort food, filled with gooey melted cheese and flavorful halal toppings, baked or air-fried to golden perfection.
Ingredients
- 1 package pizza dough or crescent dough (halal-friendly)
- 2 cups mozzarella cheese (shredded)
- 1/2 cup marinara sauce
- 1 cup vegetables (bell peppers, spinach, mushrooms)
- 1 cup halal meats (halal pepperoni, cooked chicken, or beef sausage)
- 1 tsp Italian seasoning
- 1 tbsp melted butter (optional, for brushing)
Instructions
- Preheat oven to 190°C (375°F) or prepare air fryer.
- Roll out the dough and cut into squares or circles.
- Add cheese, marinara sauce, vegetables, and halal meat to one half.
- Fold over and crimp edges tightly to seal.
- Brush tops with melted butter for extra crispiness.
- Bake for 15–20 minutes or air fry at 190°C for 8–10 minutes until golden and crispy.
- Let cool slightly before serving.
Notes
- Ensure all meats are halal-certified.
- Air frying gives a crispier texture than baking.
- Prep Time: 15 minutes
- Cook Time: 20 minutes
- Category: Lunch
- Method: Bake / Air Fry
- Cuisine: Italian