
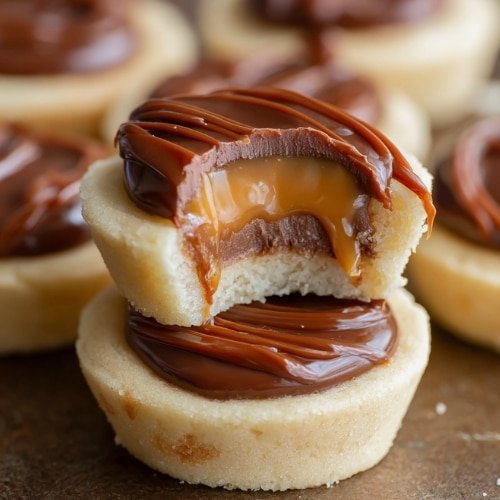
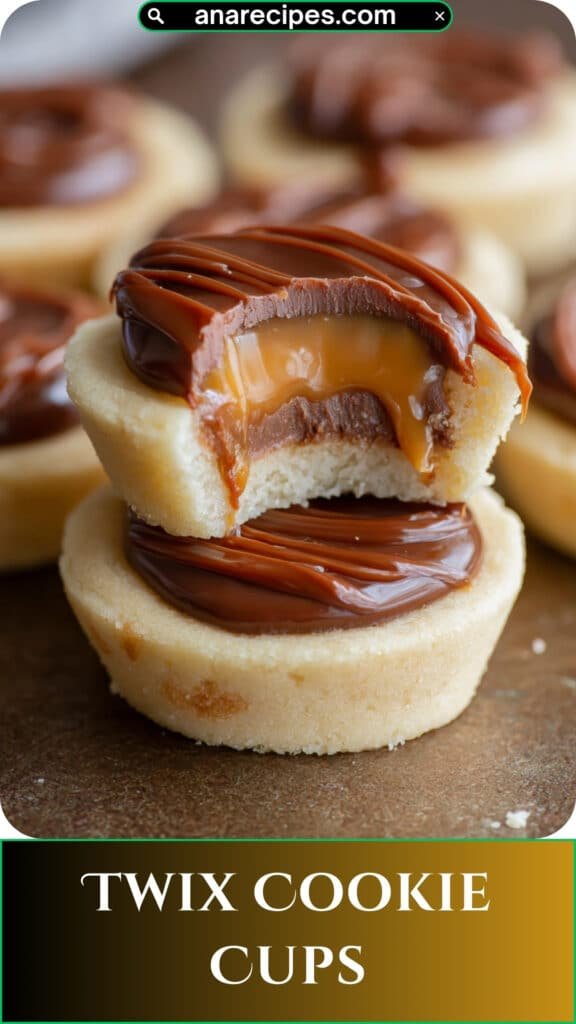
If you’ve ever wished you could capture that iconic Twix candy bar flavor in a fresh-baked cookie, these Twix Cookie Cups are your new obsession. They start with a soft, buttery sugar-cookie base, followed by a silky caramel layer and a glossy chocolate topping. They’re simple, impressive, and unbelievably delicious—perfect for parties, gifting, or satisfying a candy-bar craving without leaving the house.
Why You’ll Love This Recipe
- All the classic Twix flavors—cookie, caramel, and chocolate—in one easy homemade treat.
- Quick to make with minimal prep and simple ingredients.
- Kid-friendly, fun, and ideal for baking with the family.
- Perfect for parties, cookie trays, and holiday gifting.
- Soft, chewy, gooey, and chocolatey—everything a dessert lover wants.
Ingredients
For the Cookie Base
- Salted butter (½ cup / 111g) – Creates a soft, tender cookie crust.
- Granulated sugar (½ cup / 115g) – Sweetens and helps the cookies bake evenly.
- Vanilla extract (1 tsp) – Adds warm, classic flavor.
- Egg white (1 large) – Helps bind the dough without making it too dense.
- All-purpose flour (1½ cups / 228g) – Forms the structure for the cookie cups.
- Baking powder (1 tsp) – Provides a slight lift.
For the Caramel Layer
- Caramels (20 pieces) – Melt into a smooth, rich caramel topping.
- Milk (1 tbsp) – Helps loosen the caramel into a spoonable consistency.
For the Chocolate Topping
- Milk chocolate chips (2 cups / 400g) – Melt into a silky top layer, just like a Twix bar.
How to Make Twix Cookie Cups
Make the Cookie Base
- Preheat your oven to 350°F (175°C).
- In a large mixing bowl or stand mixer, cream together the butter and sugar until light and fluffy.
- Add in the egg white and vanilla extract, mixing until fully incorporated.
- Add the flour and baking powder. Mix thoroughly until the dough comes together.
- Roll the dough out to ¼–½ inch thickness. Use a round cookie cutter to punch out circles.
- Transfer dough circles to an ungreased baking sheet.
- Bake for 6–8 minutes, removing when the cookies are puffy and no longer glossy.
- Transfer cookies to a wire rack to cool completely.
Add the Caramel Layer
- Unwrap the caramels and place them in a microwave-safe bowl with the milk.
- Microwave for 1 minute, stirring at the 30-second mark.
- Stir until the caramel is smooth and creamy.
- Carefully spoon a few teaspoons of caramel onto each cookie, spreading it close to the edges.
- Place caramel-topped cookies in the refrigerator for 10–15 minutes to set.
Finish with Chocolate
- Microwave the chocolate chips in 30-second intervals until smooth, stirring between each heating.
- Spoon or spread a small amount of melted chocolate over the chilled caramel layer.
- Allow the chocolate topping to cool and set fully before serving.
Tips for Success
- Don’t overbake—the cookies should stay soft, just set, and lightly puffy.
- Chilling the caramel layer ensures the chocolate sits smoothly on top.
- Use high-quality chocolate for the best flavor and texture.
- If dough sticks when rolling, chill it for 10 minutes or dust lightly with flour.
Equipment Needed
- Stand mixer or hand mixer
- Flex Edge or regular beater
- Rolling pin
- Round cookie cutter
- Baking sheet
- Microwave-safe bowls
- Wire cooling rack
Recipe Variations
- Salted Caramel Twix Cups: Sprinkle flaky sea salt over the caramel.
- Dark Chocolate Version: Replace milk chocolate with dark chocolate chips.
- Mini Bites: Use a mini cutter for tiny, bite-sized cookie cups perfect for parties.
- Peanut Butter Twix Cups: Add a thin layer of peanut butter under the caramel.
- Shortbread Style: Replace half the flour with cornstarch for a melt-in-your-mouth shortbread base.
Serving Suggestions
- Pair with milk, hot chocolate, or a caramel latte.
- Add to holiday cookie platters for a candy-bar-inspired surprise.
- Serve warm with a scoop of vanilla or caramel ice cream.
- Package in treat bags for gifts, parties, or bake sales.
FAQs
Can I make these ahead of time?
Yes! They store well and taste even better the next day.
How long do Twix Cookie Cups last?
Up to 5 days in an airtight container at room temperature.
Can I freeze them?
Yes, freeze for up to 2 months. Thaw at room temperature before serving.
Can I use homemade caramel instead of store-bought?
Absolutely—use about 1 cup of your favorite soft caramel sauce.
Why use only an egg white?
It keeps the dough soft without making it cakey.

Twix Cookie Cups (Homemade Twix Cookies)
- Total Time: 40 minutes
- Yield: 24 cookie cups
- Diet: Vegetarian
Description
Twix Cookie Cups combine a soft sugar cookie base with creamy caramel and smooth milk chocolate for the ultimate homemade Twix-inspired treat.
Ingredients
- 1/2 cup (111g) salted butter
- 1/2 cup (115g) granulated sugar
- 1 tsp vanilla extract
- 1 egg white
- 1 1/2 cups (228g) all-purpose flour
- 1 tsp baking powder
- 20 caramels, unwrapped
- 1 tbsp milk
- 2 cups (400g) milk chocolate chips
Instructions
- Preheat oven to 350°F (175°C).
- Cream together butter and sugar.
- Add egg white and vanilla; mix well.
- Add flour and baking powder, mixing thoroughly.
- Roll dough to 1/4–1/2 inch thick and cut into circles. Transfer to ungreased cookie sheet.
- Bake 6–8 minutes, until puffy and no longer glossy.
- Cool cookies completely on a wire rack.
- Microwave caramels and milk for 1 minute, stirring at the 30-second mark. Stir until smooth.
- Spoon caramel onto each cookie and chill 10–15 minutes until firm.
- Melt chocolate chips in 30-second intervals until smooth.
- Spread chocolate over caramel layer and let set before serving.
Notes
- Make sure cookies cool completely before adding caramel.
- Chilling helps layers set cleanly and prevents melting.
- Prep Time: 10 minutes
- Cook Time: 10 minutes
- Category: Dessert
- Method: Baking
- Cuisine: American
Final Thoughts
These Twix Cookie Cups are everything you love about a classic Twix bar—soft cookie base, gooey caramel, smooth chocolate—but even better because they’re homemade. Perfect for any occasion and always a crowd-favorite, they’re the kind of treat you’ll want to make again and again. Enjoy every sweet, irresistible bite!