

ething undeniably joyful about sipping a thick, frosty milkshake. Now, imagine the world’s favorite cookie—Oreo—blended into that creamy indulgence. The result? A dessert that’s both nostalgic and modern, comforting yet exciting: the Oreo Milkshake.
This milkshake brings together the perfect trio of flavors and textures—the crunch of Oreo cookies, the rich creaminess of vanilla ice cream, and the smooth chill of cold milk. Each sip delivers the familiar chocolate-vanilla harmony that Oreo lovers know and crave, but in drinkable form. It’s the ultimate comfort dessert: quick, crowd-pleasing, and endlessly adaptable.
Whether you’re making it for a cozy movie night, serving it at a summer gathering, or preparing a sweet surprise for kids, the Oreo Milkshake never disappoints. It’s simple enough for beginners but can be elevated with gourmet touches to rival any café creation.
In this article, you’ll discover how to make the perfect Oreo Milkshake, step by step. You’ll learn how to adjust its consistency, explore creative flavor variations, and find expert tips to make it thick, creamy, and irresistibly delicious. We’ll also cover frequently asked questions to help you master this recipe with confidence.
Let’s blend up something sweet and special!
Ingredients (Serves 2)
- 8 Oreo cookies (plus extra for topping)
- 2 cups vanilla ice cream
- 1 cup cold milk (adjust for desired thickness)
- 1 tsp vanilla extract
- Whipped cream (for topping)
- Chocolate syrup (optional, for drizzling)
Ingredient Insights
Each ingredient plays a specific role in creating the perfect milkshake texture and flavor:
Oreo cookies:
The star of the show. Each cookie brings that classic combination of cocoa biscuit and creamy filling. When blended, they give the milkshake both its flavor and its subtle crunch. You can experiment with different Oreo varieties—Double Stuf for extra sweetness, Mint Oreos for a refreshing twist, or Golden Oreos for a lighter flavor.
Vanilla ice cream:
This forms the luxurious, creamy base of the milkshake. Opt for a rich, full-fat ice cream made with real vanilla. It balances the deep cocoa notes of the Oreos and ensures a smooth texture.
Milk:
Milk thins out the ice cream to create a drinkable consistency. Whole milk is ideal for richness, but 2% milk or plant-based alternatives like almond, oat, or coconut milk can be used for a lighter or dairy-free version.
Vanilla extract:
Optional but recommended. It enhances the sweetness naturally and deepens the overall flavor.
Whipped cream and chocolate syrup:
These finishing touches turn your milkshake into a dessert experience. The whipped cream adds lightness, while the chocolate drizzle adds visual flair and an extra dose of indulgence.
Equipment You’ll Need
To make a flawless Oreo Milkshake, gather the following tools:
- High-speed blender – Essential for crushing the Oreos evenly and blending the ingredients into a silky texture.
- Measuring cups and spoons – For accurate proportions.
- Ice cream scoop – To easily measure out the ice cream.
- Chilled tall glasses – Keep your milkshake cold and café-style.
- Straws and long spoons – For that authentic diner presentation.
Preparation Method
The Oreo Milkshake is one of the easiest desserts to make—no cooking, no baking, just blending. Follow these steps to create the perfect version every time.
Step 1: Chill Your Glasses
Before blending, place your serving glasses in the freezer for about 5 to 10 minutes. This simple trick ensures your milkshake stays cold longer and gives it that frosty, professional touch.
If you plan to use chocolate syrup, drizzle it inside the glass in swirling patterns before chilling. Once the syrup sets slightly, it will create beautiful chocolate ribbons inside the glass.
Step 2: Blend the Base
Add the following ingredients to your blender:
- 8 Oreo cookies
- 2 cups vanilla ice cream
- 1 cup cold milk
- 1 tsp vanilla extract
Blend on medium-high speed for about 20–30 seconds until everything is smooth and creamy.
💡 Pro Tip: If you prefer some cookie texture, pulse the blender a few times instead of blending continuously. This keeps small Oreo chunks intact for a crunchy surprise in every sip.
Step 3: Adjust the Consistency
Milkshake thickness is all about personal preference:
- For a thicker milkshake, add more ice cream and blend again briefly.
- For a thinner milkshake, add milk one tablespoon at a time until it reaches your desired consistency.
A perfect Oreo Milkshake should be thick enough to stand a straw upright but smooth enough to sip without resistance.
Step 4: Pour and Garnish
- Remove your chilled glasses from the freezer.
- Pour the milkshake into each glass, filling it nearly to the top.
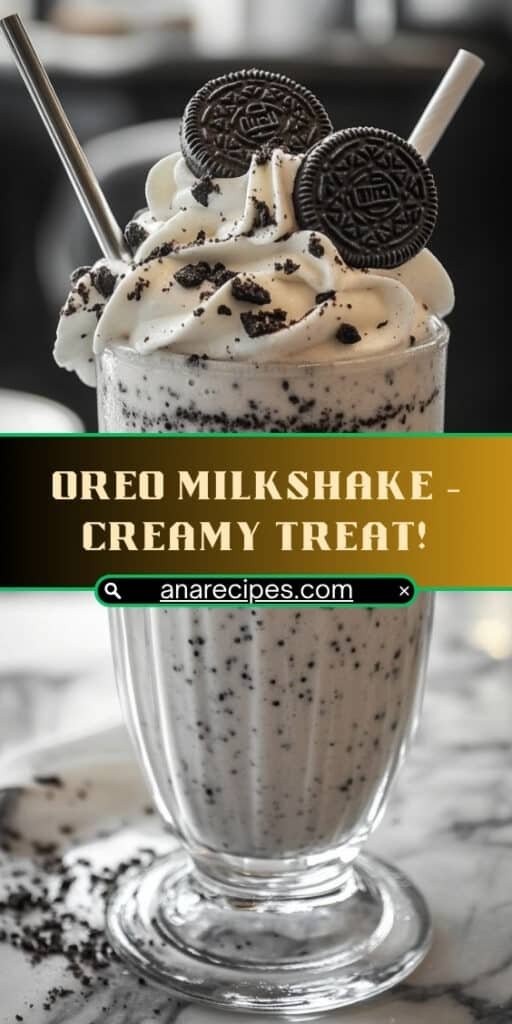
- Top with a generous swirl of whipped cream.
- Sprinkle crushed Oreos or add a whole cookie as garnish.
- Drizzle chocolate syrup on top for extra decadence.
Serve immediately with a straw or spoon, and enjoy the creamy, crunchy goodness while it’s cold and frothy.
Tips for the Perfect Oreo Milkshake
Creating the ideal Oreo Milkshake isn’t just about blending ingredients—it’s about balance. These expert tips will help you get it right every time:
- Use high-quality ice cream.
Premium brands that use real cream and natural vanilla yield the creamiest, richest results. - Chill your ingredients.
Cold milk and frozen ice cream blend better and stay thick longer. - Avoid over-blending.
Too much blending can make the shake watery and eliminate all cookie texture. - Use the right milk ratio.
For every two cups of ice cream, use about one cup of milk. Adjust slowly—adding too much milk early can make it thin. - Serve immediately.
Milkshakes are best enjoyed fresh. The longer they sit, the more they melt and lose that thick, creamy texture. - Experiment with Oreos.
Try limited-edition or flavored varieties—Mint, Strawberry, Peanut Butter, or even Birthday Cake Oreos—for fun twists.
Creative Variations
The best part about an Oreo Milkshake is how customizable it is. Once you’ve mastered the classic, try one of these creative spins:
1. Chocolate Oreo Milkshake
Replace half the vanilla ice cream with chocolate ice cream or add 2 tablespoons of cocoa powder. Top with chocolate shavings for a double-chocolate delight.
2. Mint Oreo Milkshake
Add 1/4 teaspoon of peppermint extract and a drop of green food coloring for a cool, refreshing version that looks as good as it tastes.
3. Peanut Butter Oreo Milkshake
Blend in 2 tablespoons of creamy peanut butter. The combination of chocolate, vanilla, and peanut butter is pure perfection.
4. Mocha Oreo Milkshake
Add a shot of espresso or 1/4 cup of strong cold brew coffee to create a caffeinated twist. Perfect for coffee and chocolate lovers alike.
5. Caramel Oreo Milkshake
Drizzle caramel sauce inside the glass and blend 2 tablespoons into the shake for a buttery, sweet flavor.
6. Vegan Oreo Milkshake
Swap the dairy ingredients for plant-based ice cream (coconut or almond-based) and non-dairy milk. Most Oreo varieties are already vegan, making this an easy switch.
7. Cookies & Cream Deluxe
Add 1 extra scoop of ice cream and a handful of mini Oreos. Blend lightly for an extra chunky, dessert-like texture.
Serving Ideas
- Classic diner style: Serve in tall milkshake glasses with a straw and a long spoon.
- Party-ready: Pour into small mason jars and top each with whipped cream and a mini Oreo.
- Summer treat: Pair with burgers, fries, or hot dogs for the ultimate nostalgic combo.
- Dessert upgrade: Turn it into a milkshake float by topping with a scoop of ice cream instead of whipped cream.
Nutritional Information (Per Serving)
| Nutrient | Amount (Approx.) |
|---|---|
| Calories | 550–600 kcal |
| Carbohydrates | 65 g |
| Protein | 9 g |
| Fat | 28 g |
| Sugar | 55 g |
| Calcium | 30% DV |
(Note: Nutritional values vary depending on the brands and substitutions used.)
Frequently Asked Questions (FAQs)
1. Can I make an Oreo Milkshake without ice cream?
Yes! Substitute ice cream with 2 cups of crushed ice, 1/2 cup milk, and 2–3 tablespoons of condensed milk or heavy cream. The texture won’t be as creamy, but it’s still delicious.
2. What’s the best way to crush Oreos for a chunky milkshake?
Break them by hand or pulse them briefly in a food processor. For small pieces, pulse the blender at the end of mixing rather than adding them at the start.
3. How can I make my milkshake thicker?
Use less milk, more ice cream, or freeze the Oreos for 10 minutes before blending. You can also add a tablespoon of malted milk powder for an old-fashioned diner-style thickness.
4. Can I store leftover milkshake?
Milkshakes are best consumed immediately. If you must store it, freeze it in an airtight container for up to 30 minutes, then re-blend briefly before serving.
5. Can I use chocolate ice cream instead of vanilla?
Absolutely. Chocolate ice cream deepens the flavor and pairs beautifully with the Oreos. It’s perfect for chocolate lovers.
6. Is it possible to make this milkshake vegan or lactose-free?
Yes—use vegan ice cream and plant-based milk such as almond, soy, or oat milk. Since most Oreos don’t contain dairy, the flavor remains authentic.
7. Can I make it ahead for parties?
For best results, blend right before serving. However, you can pre-scoop the ice cream and portion the cookies into bags to speed up prep time.
8. How can I make this milkshake look Instagram-worthy?
Use a clear glass, drizzle chocolate syrup before pouring, and top with a mountain of whipped cream, crushed Oreos, and a chocolate wafer straw. Presentation is half the fun!
Conclusion
The Oreo Milkshake is more than just a dessert—it’s an experience of pure comfort and nostalgia. Each sip blends the best of both worlds: creamy vanilla ice cream and crunchy chocolate cookies, coming together in perfect harmony.
From the first swirl of chocolate syrup to the last spoonful of whipped cream, it’s a treat that satisfies every craving. The beauty of this milkshake lies in its simplicity—minimal ingredients, maximum indulgence, and endless customization.
Whether you prefer it classic, ultra-chocolatey, or with a unique twist, this recipe delivers every time. It’s the perfect dessert for any season, occasion, or mood.
So grab your blender, toss in those Oreos, and whip up this creamy and crunchy delight. It’s quick to make, impossible to resist, and guaranteed to bring a smile to every face around the table.
Cheers to the timeless magic of Oreos—now in milkshake form! 🥤
Print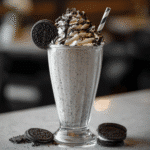
Oreo Milkshake – Creamy & Crunchy Treat!
- Total Time: 5 minutes
- Yield: 2 servings
- Diet: Vegetarian
Description
This Oreo Milkshake is a rich, creamy, and indulgent treat that perfectly blends crunchy cookies with smooth vanilla ice cream. It’s the ultimate quick dessert or afternoon pick-me-up—ready in minutes and irresistibly delicious!
Ingredients
- 8 Oreo cookies (plus extra for topping)
- 2 cups vanilla ice cream
- 1 cup cold milk (adjust for thickness)
- 1 tsp vanilla extract
- Whipped cream, for topping
- Chocolate syrup, for optional drizzle
Instructions
- Place Oreo cookies, vanilla ice cream, milk, and vanilla extract into a blender.
- Blend until smooth and creamy. For a thicker milkshake, add less milk; for a thinner texture, add a bit more.
- Drizzle chocolate syrup inside serving glasses if desired.
- Pour the milkshake into glasses, top with whipped cream, and crumble extra Oreos on top.
- Serve immediately with a straw and enjoy!
Notes
- For a richer flavor, add a spoonful of chocolate syrup or malt powder before blending.
- Try swapping vanilla ice cream for chocolate or cookies & cream for a flavor twist.
- Vegan option: use dairy-free ice cream and plant-based milk.
- Prep Time: 5 minutes
- Cook Time: 0 minutes
- Category: Drinks
- Method: Blended
- Cuisine: American