

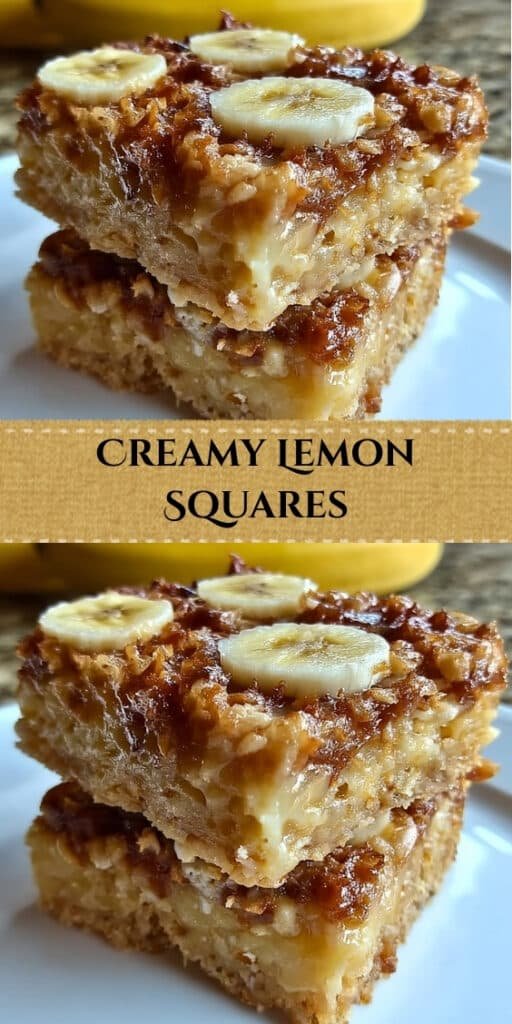
If you love bright, refreshing, and irresistibly creamy desserts, these Creamy Lemon Squares will become your new go-to treat. With a zesty lemon filling and a buttery graham cracker crust, every bite offers the perfect mix of tangy citrus and silky sweetness. These bars are simple to prepare, bake beautifully, and chill into clean, gorgeous slices that look stunning on any dessert table. Perfect for spring gatherings, holiday parties, potlucks, or an easy weekend dessert, these creamy lemon squares bring sunshine to every bite.
Why You’ll Love This Recipe
- Ultra-creamy lemon filling with bold citrus flavor
- Simple ingredients and beginner-friendly steps
- A buttery graham crust that pairs perfectly with the tangy filling
- Easy make-ahead dessert that chills beautifully
- Great for parties, potlucks, and refreshing summer treats
Ingredients
- Graham cracker crumbs (1½ cups): Creates the soft, crunchy base.
- Sugar (¼ cup): Sweetens the crust and balances the lemon.
- Melted butter (6 tbsp): Helps bind the crust and adds richness.
- Sweetened condensed milk (14 oz can): Forms the creamy, smooth filling.
- Lemon juice (½ cup): Gives the bars their signature tart flavor.
- Lemon zest (1 tbsp): Enhances freshness and aromatic citrus notes.
- Egg yolks (3 large): Thicken the filling for a custard-like texture.
- Vanilla extract (½ tsp): Adds warmth and depth to the lemon flavor.
- Powdered sugar (optional): For a delicate dusting on top.
How to Make Creamy Lemon Squares
1. Prepare the Crust
Preheat your oven to 350°F (175°C). In a bowl, combine the graham cracker crumbs, sugar, and melted butter until the mixture resembles wet sand. Press firmly into an 8×8-inch baking pan. Bake the crust for 8 minutes, then let it cool slightly.
2. Make the Lemon Filling
In a mixing bowl, whisk together the sweetened condensed milk, lemon juice, lemon zest, egg yolks, and vanilla extract until smooth and fully combined.
3. Bake the Bars
Pour the lemon filling evenly over the cooled crust. Bake for 12–15 minutes, just until the center is set and no longer jiggly.
4. Chill and Slice
Allow the lemon squares to cool completely, then refrigerate for at least 2 hours. Once fully chilled, slice into clean squares and dust with powdered sugar if desired.
Tips for Success
- Use fresh lemon juice for the brightest, most flavorful results.
- Chill thoroughly before slicing to get clean, neat edges.
- Avoid overbaking—the filling should be set but still soft.
- Press the crust firmly to prevent crumbling when sliced.
- Use a hot knife (run under warm water) for smooth cutting.
Equipment Needed
- 8×8-inch baking pan
- Mixing bowls
- Whisk
- Measuring cups and spoons
- Spatula
- Knife for slicing
Recipe Variations
- Meyer Lemon Squares: Use Meyer lemons for a sweeter, floral flavor.
- Tart Lemon Bars: Add an extra tablespoon of lemon zest for more zing.
- Digestive Biscuit Crust: Substitute graham crumbs with crushed digestive biscuits.
- Coconut Lemon Bars: Fold ¼ cup shredded coconut into the crust mixture.
- Gluten-Free Version: Use gluten-free graham crackers.
Serving Suggestions
- Dust with powdered sugar for a classic finish.
- Top with whipped cream and a twist of lemon zest.
- Serve chilled on a summer brunch table.
- Pair with fresh berries or raspberry sauce.
FAQs
Can I make these ahead of time?
Yes, they chill beautifully and can be made a day in advance.
How should I store lemon squares?
Store in an airtight container in the refrigerator for up to 3–4 days.
Can I freeze them?
Yes—freeze individually wrapped squares for up to 2 months.
Can I use bottled lemon juice?
You can, but fresh lemon juice provides better flavor.
Why is my filling runny?
They may need more chilling time, or they were underbaked.
Can I double the recipe?
Yes! Bake in a 9×13 pan and add 3–5 extra minutes of bake time.
Creamy Lemon Squares (3-Ingredient Style, Irresistible & Zesty!)
- Total Time: 2 hours 35 minutes
- Yield: 12 squares
- Diet: Vegetarian
Description
Creamy Lemon Squares are a bright, zesty dessert with a creamy lemon filling on a soft graham crust.
Ingredients
- 1 1/2 cups graham cracker crumbs
- 1/4 cup sugar
- 6 tbsp melted butter
- 1 can (14 oz) sweetened condensed milk
- 1/2 cup lemon juice
- 1 tbsp lemon zest
- 3 large egg yolks
- 1/2 tsp vanilla extract
- Powdered sugar (optional for topping)
Instructions
- Preheat your oven to 350°F (175°C).
- Combine graham crumbs, sugar, and melted butter. Press into an 8×8 baking pan. Bake crust for 8 minutes, then let cool slightly.
- In a bowl, whisk condensed milk, lemon juice, lemon zest, egg yolks, and vanilla until smooth.
- Pour filling over the crust and spread evenly.
- Bake 12–15 minutes until the center is just set.
- Cool completely, then refrigerate 2 hours for clean cuts.
- Dust with powdered sugar before serving.
Notes
- For clean cuts, refrigerate the bars until well chilled before slicing.
- Fresh lemon juice yields a brighter flavor; bottled juice works too.
- If you don’t have graham crackers, crushed digestive biscuits work as a substitute.
- Store leftovers in an airtight container in the refrigerator for up to 3–4 days.
- Prep Time: 10 minutes
- Cook Time: 25 minutes
- Category: Dessert
- Method: Baking
- Cuisine: American
Conclusion
Creamy Lemon Squares bring together everything wonderful about a citrus dessert—zesty flavor, silky texture, and effortless preparation. Whether you’re hosting a gathering or simply treating yourself, these bars offer a refreshing burst of sunshine in every bite. Don’t forget to chill them well, slice cleanly, and enjoy the creamy, tangy magic. Try them once, and they’ll become a permanent part of your dessert collection!